Have you all seen those cement tiles that come in so many cool prints? Not wanting to replace all the tile got us thinking about how we could accomplish this high impact look for less. Follow this simple tutorial for all the tips on how to create this amazing new floor space.
Tutorial Source: Driven by Décor
STEP 1: SAND TILE FLOORS
Sanding the tile helps scuff up the surface of it to help the primer adhere. And I was able to sand right off the disgusting unidentified crap on the surface of my tile. The purpose is not to remove the glaze on the tile – it’s just to scuff it up. Note – that ceramic tile can contain lead so consider testing for it or consulting with a professional if you’re unsure about your tile. Always use protective eyewear and an appropriate mask or respirator to prevent you from breathing in the sanding dust. Contain the dust so it doesn’t go into other areas of the house.
I used an electric sander which makes the job so much quicker and easier than doing it by hand. If you do a lot of projects around the house and don’t already have one of these electric sanders, I’d highly recommend it – it’s lightweight, fits in the palm of your hand, and has an angled head to get into corners easily:
I sanded the tiles that had a build-up of crud on them with 80 grit, did the whole floor with 120 grit, and then finished off with a quick once-over with a fine 240 grit.
STEP 2: CLEAN YOUR FLOORS…WELL
After finishing sanding, I vacuumed up all of the dust and debris and then went to town on cleaning my floors. Any heavy-duty stripper & cleaner should do the job.
I mixed the cleaner with water (per the instructions), mopped it onto the floor, let it sit for about 15 minutes, and then scrubbed the entire floor with a nylon scrub brush. Then I cleaned it off with bucket of warm water and did it a second time. The cleaner the floor, the better your paint will adhere!
STEP 3: REPAIR ANY MISSING GROUT OR CRACKED TILES
The grout on our floor was a mess and there are several areas where chunks of it were missing. Regrouting is a pretty huge job since you need to spend a lot of time digging out the old grout first so I went the easy route and simply used paintable caulk to fill in and smooth over any bare spots in my grout. The caulk adhered well and now that it’s painted, you would never know that I had done it. Now would be the time to replace or repair any cracked tiles too. I had one tile closer to our bathtub with a crack in it but knew it would be covered by our bathroom rug so I simply caulked the cracked portion and sanded down the rough edge a bit instead of replacing it.
STEP 4: APPLY A GOOD PRIMER
Using a really good primer is the key to success for painting ceramic tile! I used INSL-X STIX which is my go-to primer for painting surfaces that paint might normally have a hard time adhering too. I used a paint brush and small roller simultaneously, painting the edges and grout lines with my brush and then rolling on the primer for the rest. Just make sure you start at the far end of the room and work towards the door so you don’t paint yourself into a corner. Once it was dry, I recoated using the same technique.
STEP 5: PAINT YOUR TILE!
I painted our floor tile in the same way as I primed it, using a paint brush on the edges and on the grout and rolling the rest as I went.
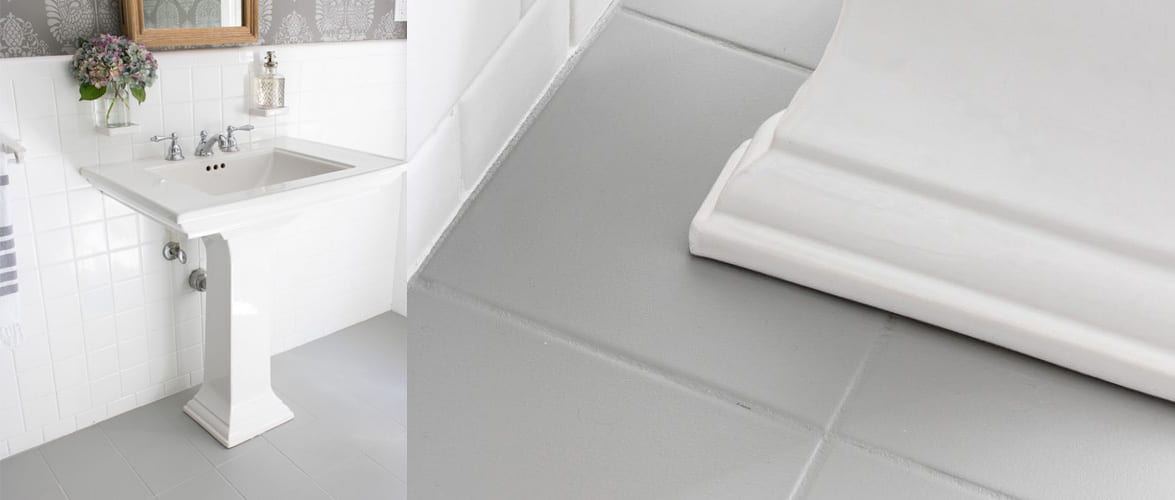
The type of paint that I used was Benjamin Moore’s Floor & Patio Paint since it’s meant to stand up to lots of use and abuse. It comes in High Sheen and Low Sheen options – I chose Low Sheen just for personal preference. I applied three coats of paint, letting it dry according to the paint instructions in between coats. The color I went with is Benjamin Moore Platinum Gray, which is the same gray color as the lighter portions of my stenciled walls.
If you want to have some fun with your tiles, feel free to use a stencil and create a one-of-a-kind design.
STEP 6: SEAL YOUR TILE?
The last step if you choose to do it, is to seal your tile. I was definitely torn on whether to seal mine – with porch paint you technically don’t need to seal it since the paint is made to withstand a lot of wear but sealing it with a polyurethane would definitely make painted tile more durable. The only negative to using polyurethane is that if you do get a gash in your floor or some other area that needs to be repaired, it’s a little trickier to fix in a way that it blends in perfectly if you’ve top coated with polyurethane. So for now, my floors are going topless (and after being used for several months have held up really well) but if your floors get lots of wear and tear, a topcoat of polyurethane is definitely something I’d think about.
STEP 7: LET YOUR FLOOR DRY & THEN PUT IT TO USE!
After your last coat of paint or polyurethane, give your floor at least a couple of days to fully dry before walking on it (the more humid it is, the longer it will take) – it’s best to be gentle with it (no heeled shoes, etc.) for the first week or two until everything is fully cured. We’ve been back to using our bathroom normally for a few months now and the painted tile has held up beautifully! The only issue I’ve had is a small but deep scratch on one of the tiles that was obviously made by something sharp – I’m guessing a small stone that got stuck in someone’s shoe tread. I was able to sand it and repaint just that one tile and now you’d never know anything was once there.


